CLICK HERE FOR FREE BLOGGER TEMPLATES, LINK BUTTONS AND MORE! »

Wednesday, January 8, 2014

Cookies!

Now, before you continue reading, you should know that these are not just any regular cookie. These are something more amazing than your plain old chocolate chip cookies. These are salted chocolate chip cookies stuffed with Nutella. 

http://media-cache-ec0.pinimg.com/236x/dd/d5/a8/ddd5a8bb5609087c2761a11b9cca50bf.jpg

Look at that!!! You know you want some! The recipe was pretty simple. One thing I would warn you all of is that they have to chill for TWO hours before you can put them in the oven. Not a huge deal, but it is something to know because we didn't know until we were actually making them and they ended getting done at like 9 o' clock at night. But they were still good! Another thing is I would highly suggest refrigerating the Nutella before you bake them. It made it so much easier to make them. But they were crazy good. I would highly suggest you make some. As soon as possible!

Rating-
Difficulty- 3
Time- 5 (This includes the time it took to chill)
Overall- 5

Well, that's all for now!

Victoria

Tuesday, December 17, 2013

How Geeks Celebrate Christmas

To celebrate the Christmas season, I thought we would start off with something a little different. If you have a huge book collection, then this is definitely for you!


Isn't it beautiful?!? I absolutely love it!!! So much that I have been building one over the weekend and currently have one in my bedroom. There is going to be some crocheted Christmas lights on it, but I will save that for another post. It actually is not as hard as it looks! It can be a little time consuming, but is really very easy. It makes me so happy. Mine was a decent size and I used about 142 books. That's how many I counted anyways. It looks absolutely gorgeous sitting in my bedroom. At least a geek like me would think so. These kinds of things are what makes geeks happy. In case you weren't aware that is....

Rating
Time- 4
Difficulty- 3
Overall- 5!

Happy Holidays!
Victoria

Monday, October 21, 2013

This one is for all of you Doctor Who Fans!

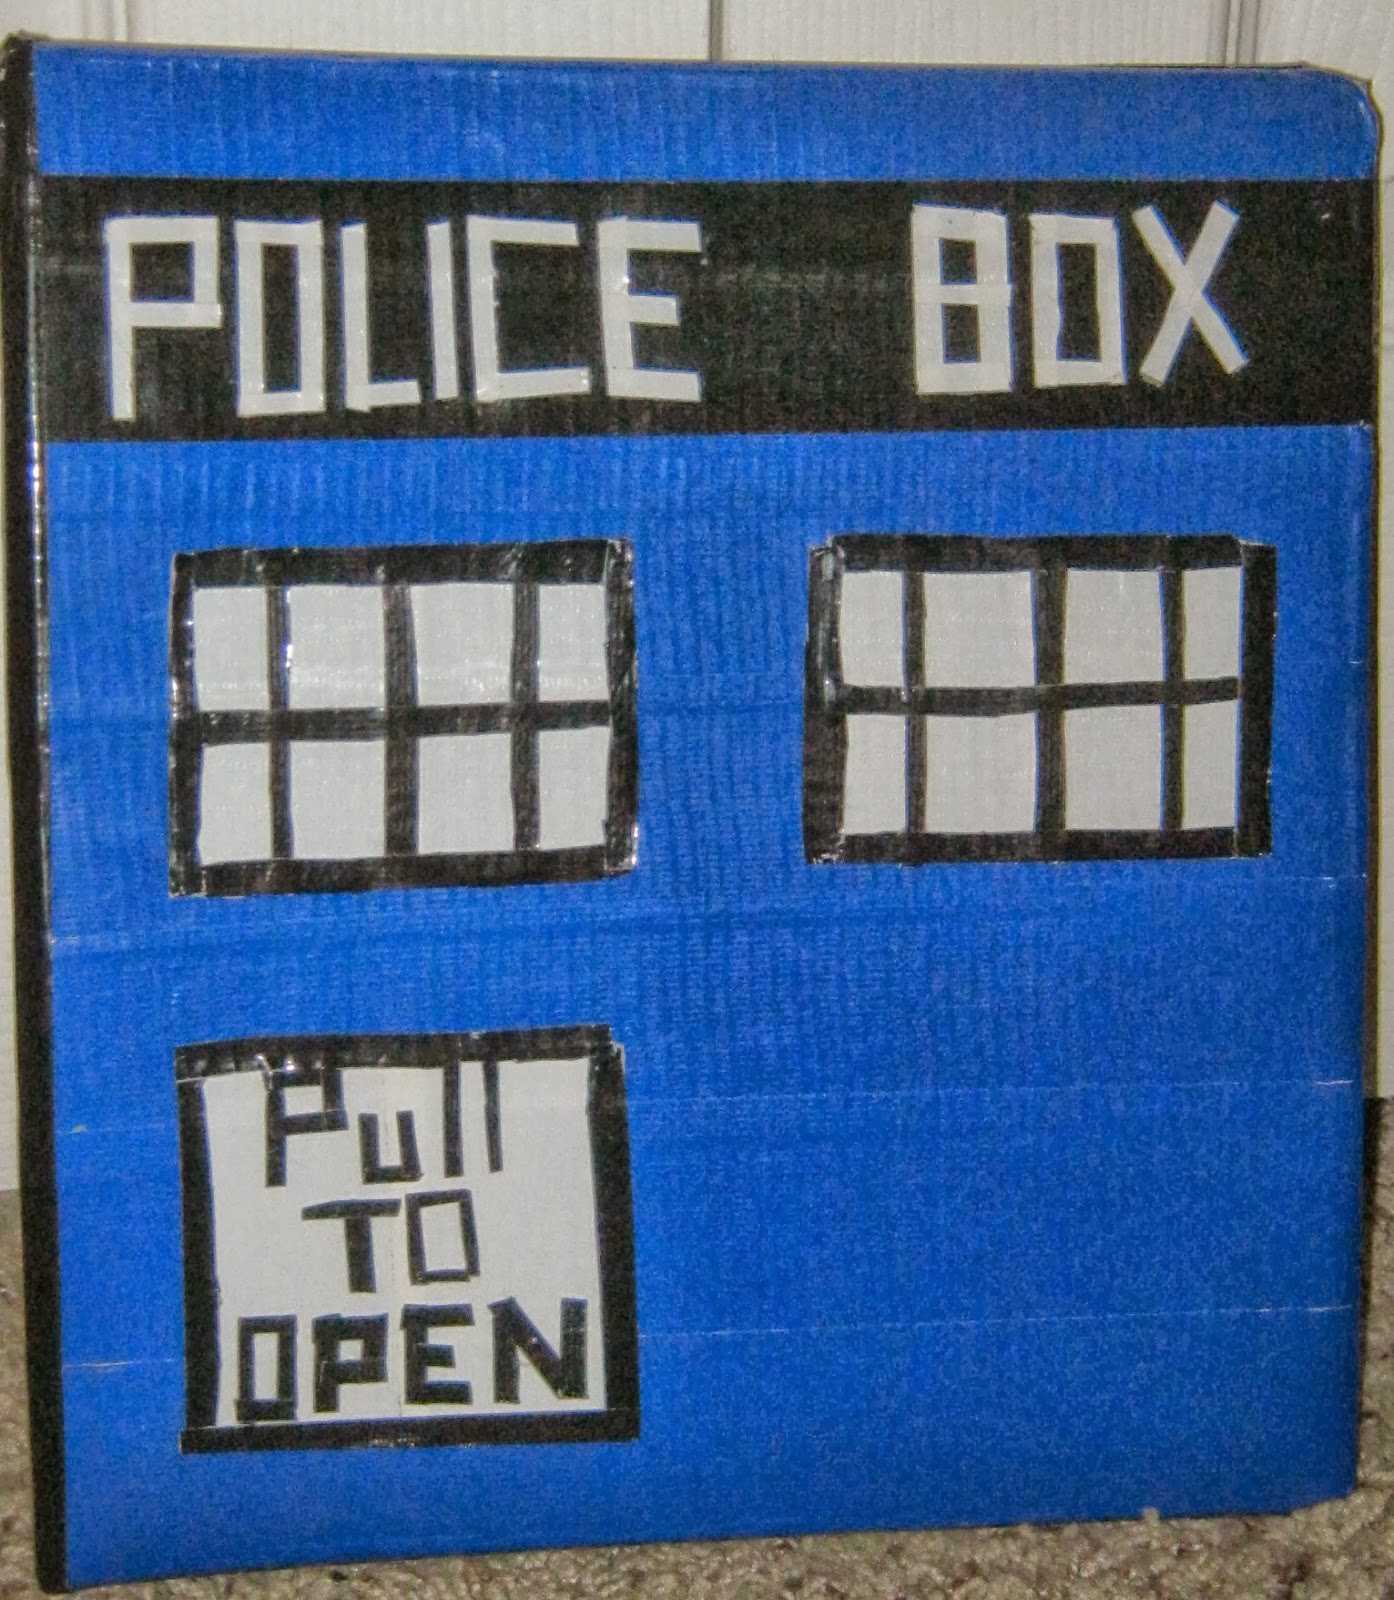
If you like Doctor Who this one is for you! We all love the TARDIS, how could you not? So I decided to make a binder that looks like our beloved TARDIS. For those of you who may wonder, unfortunately the answer is no, it is not bigger on the inside. =( But it still looks cool!! So I started with an old binder, scissors, and duct tape. This was my old binder. I know, it's weird. But I have had it for several years. From back when there was a Hannah Montana....


 Anyways, moving on! I had to remove the lovely plastic covering the binder because it made the Duct Tape look bubbly. So I cut that off and it made it much easier. After that I covered it with the Duct Tape. I covered the entire binder in a dark blue and then I added all the other parts to it. I had some genius idea to create the words by using little strips of Duct Tape. So it took FOREVER. But it looks good! So I am happy with it. Here is the finished binder


Isn't it cool?! I love it!!

Rating- Time-4-5
             Difficutly- 3
             Overall- 4 1/2

Thanks for reading!

Victoria

Thursday, October 10, 2013

How to clean the rubber tips on your Converse shoes!

Hey everyone, I'm finally posting! I'm sorry it took me this long... Oh well, I'm here now!

I just recently got some Converse, and I love them! However.. As soon as I walked out of the shoe store, they were already dirty! I knew right then and there I was going to have to figure out how to re-whiten them. So I googled it, and the most popular result was baking soda! It's so easy, and it works really well!

You will need: 
Baking soda
Water
A small dish
An old toothbrush
Dirty Converse shoes

I definitely had the dirty Converse! 


I mean, they were pretty gross!


So, here's what you do. Get a small container, and add some baking soda. Now, add a tiny bit of water. If it's not enough of a paste, add a little more. You should come out with something looking like this:


Now, get your toothbrush, and apply a pea sized amount of the paste on it.


Now, scrub it in!


Look at those nice suds!


It's okay if you get some on the shoe part, it can be wiped off. After you scrub it in and get all of the dirt off, wipe it off really well with a paper towel. (You can use a napkin, a regular towel, anything to wipe it off.)
I also did the rubber part all around the edges of the bottom, but you don't have to. Your shoes should come out looking something like this!


Look at how nice those are compared to when you started!


By the time you finish, your shoes look as good as new!


It's okay if you make a bit of a mess...it's easy to clean up


It's a really nice trick to get your Converse shoes sparkling again!

Time for the rating:
Difficulty: 1
Time: 1
Finished Project: 5

I hope this helps! If you have any suggestions on future crafts or recipes, let us know in the comments section below. 

Thanks for reading! 

~Miranda

Wednesday, September 18, 2013

Tangled headphone solution

Ever get tangled headphones? Of course you do! We all do. Here is a solution to your problem
 http://media-cache-ec0.pinimg.com/736x/c6/61/3b/c6613b72a12cb3ad22611b3b0a431f76.jpg
 So it worked pretty well. It does take a couple minutes to do but it is usually well worth it. So I hope you try it out and see what you think for yourselves!

Rating- Difficulty- 1
            Time- 1
            Overall- 5

Thanks for reading!!
Victoria

Fabulous Trick For Soft Hands

Today we have something a little different. This is something me and my friend Miranda did a little while ago. And can I say that it is amazing!!

http://media-cache-ak0.pinimg.com/236x/67/67/4d/67674d8fbc1967806eeb2a7a3aeb8de6.jpg


So what you do is get a handful of sugar and lay it in your hand like pictured. Then, you put some olive oil on top of your pile of sugar. Rub it all over your hands for about a minute or so, and then rinse off. And let me say, your hands will feel absolutely amazing afterwards! It really does work!! My hands have never been softer. It was so easy yet had fabulous results.

Rating- Time- 1
            Difficulty- 1
            Overall- 5

Saturday, August 10, 2013

Another Mini Bow and Arrow

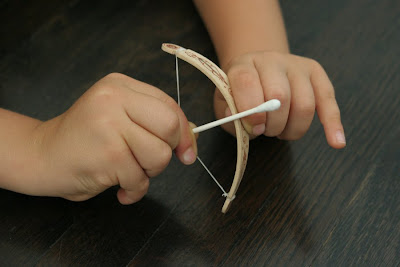
Yes I am posting another mini bow and arrow. But this was one I did a while ago. It was ok. I actually was not very pleased with it. It just didn't work very well. Overall I didn't enjoy it very much.You made it with a popsicle stick, dental floss, and a q-tip.
 https://blogger.googleusercontent.com/img/b/R29vZ2xl/AVvXsEgGc-SZhlSMyBax67SQGYRRq1FyoYpDAKpJFLeWoQs27udFlCAI0L_GeqaJBezV5nPgQv2028k8PAiRzpt7K_kB3uBoL0yRV5QsgWXuJ6saWIEhpWM9Q12HsGMF0ORqoeuoFyhBdqhqtao/s400/Bow+and+Arrow+5.jpg
  Although, I didn't soak it in water like it said to. That could've helped.  But I liked my other one better.

Rating- Time- 1
             Difficulty- 2
             Overall- 1

Until next time,
 Victoria

Friday, August 9, 2013

Homemade Kazoo

Today I am sharing a project you can do with little kids!! It's a homemade kazoo. You put wax paper over a toilet paper tube and secure it with a rubber band. You can hum into it and it sounds like a kazoo. It was actually pretty cool! Very easy and fun.


Rating- Difficulty- 1
    Time- 1
Overall-5

Tuesday, July 23, 2013

Plastic Spoon Rose


At one of our previous sleepovers, me and my friend Miranda were looking for something to do. And this is what we came up with. A plastic spoon rose. We foun instructions that said to melt the spoons with a candle. Then, you glued them all together. How hard could it be? Apparently really hard!! They took forever to melt if you held it above the candle but burned when you held it right up next to the flame. Burning plastic spoons are no fun. Just trust me on this one. And then once we finally got them all melted, it took forever to try and fit it together. Because they all melted completely different from each other. The top is the one off of Pinterest, the bottom, is ours. We thought the different colors of spoons would be cool since we had them. 

Plastic Spoon Rose Necklace


Rating-
Time- It was about a 4
 Difficulty-4
 Overall- 3

Victoria

Mini Bow and Arrow

So I'm sure by now you have all seen this, right?

  Whoa

Seemed cool! So I of course had to try!! I got the pen to make and and I was set. Except I also ended up needing scissors, duct tape, a glue gun, and burn gel. I needed the scissors because, well, there is no other easy way to make a hole in the middle of the pen. Hence bringing out the scissors to poke a hole in it. The glue gun and duct tape would be because the rubber band would not stay for anything!! So I put a ton of glue on the end of it with the rubber band. Then it would still not stay so I decided to use duct tape as plan B. Burn gel is because I burned my fingers several times with the glue gun. Not fun, but it happens to the best of us. So I finally got it finished and surprisingly, it actually works really well!! Took way longer than I anticipated but is actually really fun to use!!

Rating: Time-2
            Difficulty-2
            Overall-4

Victoria 

Thursday, May 30, 2013

Cupcakes!

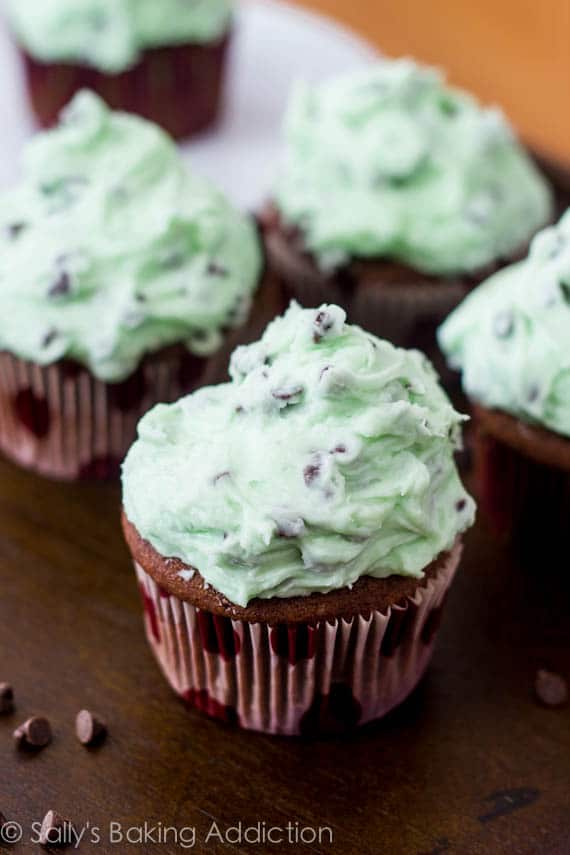
Yesterday, I make cupcakes. Mint chocolate chip cupcakes. They looked really good! Here's a picture:         
Chocolate Cupcakes with Mint Chocolate Chip Frosting by sallysbakingaddiction.com
They were actually really good. The cupcake didn't turn out as well as I was hoping. I have had better cupcakes, but the frosting was really good!! The only thing, is with the frosting, we were out of butter and I had to use a substitute. And it had a weird sort of aftertaste to it. But it was just because of what I used as a substitute. I'm sure if I used real butter there would be no other problems. Other than that, there were no big problems! And just a quick little side note, their frosting was green, while our frosting ended up purple. Per request of my little sisters. The food coloring is optional though

Rating:
Time- 4
Difficulty- 3
Overall- 5

 That's all for now!
Victoria

Wednesday, May 1, 2013

British Flag Project

I would like to just say real quick that this is not a project off of pinterest. This is just something I came up with and decided to make. Although I am still going to share it with all of you who read this


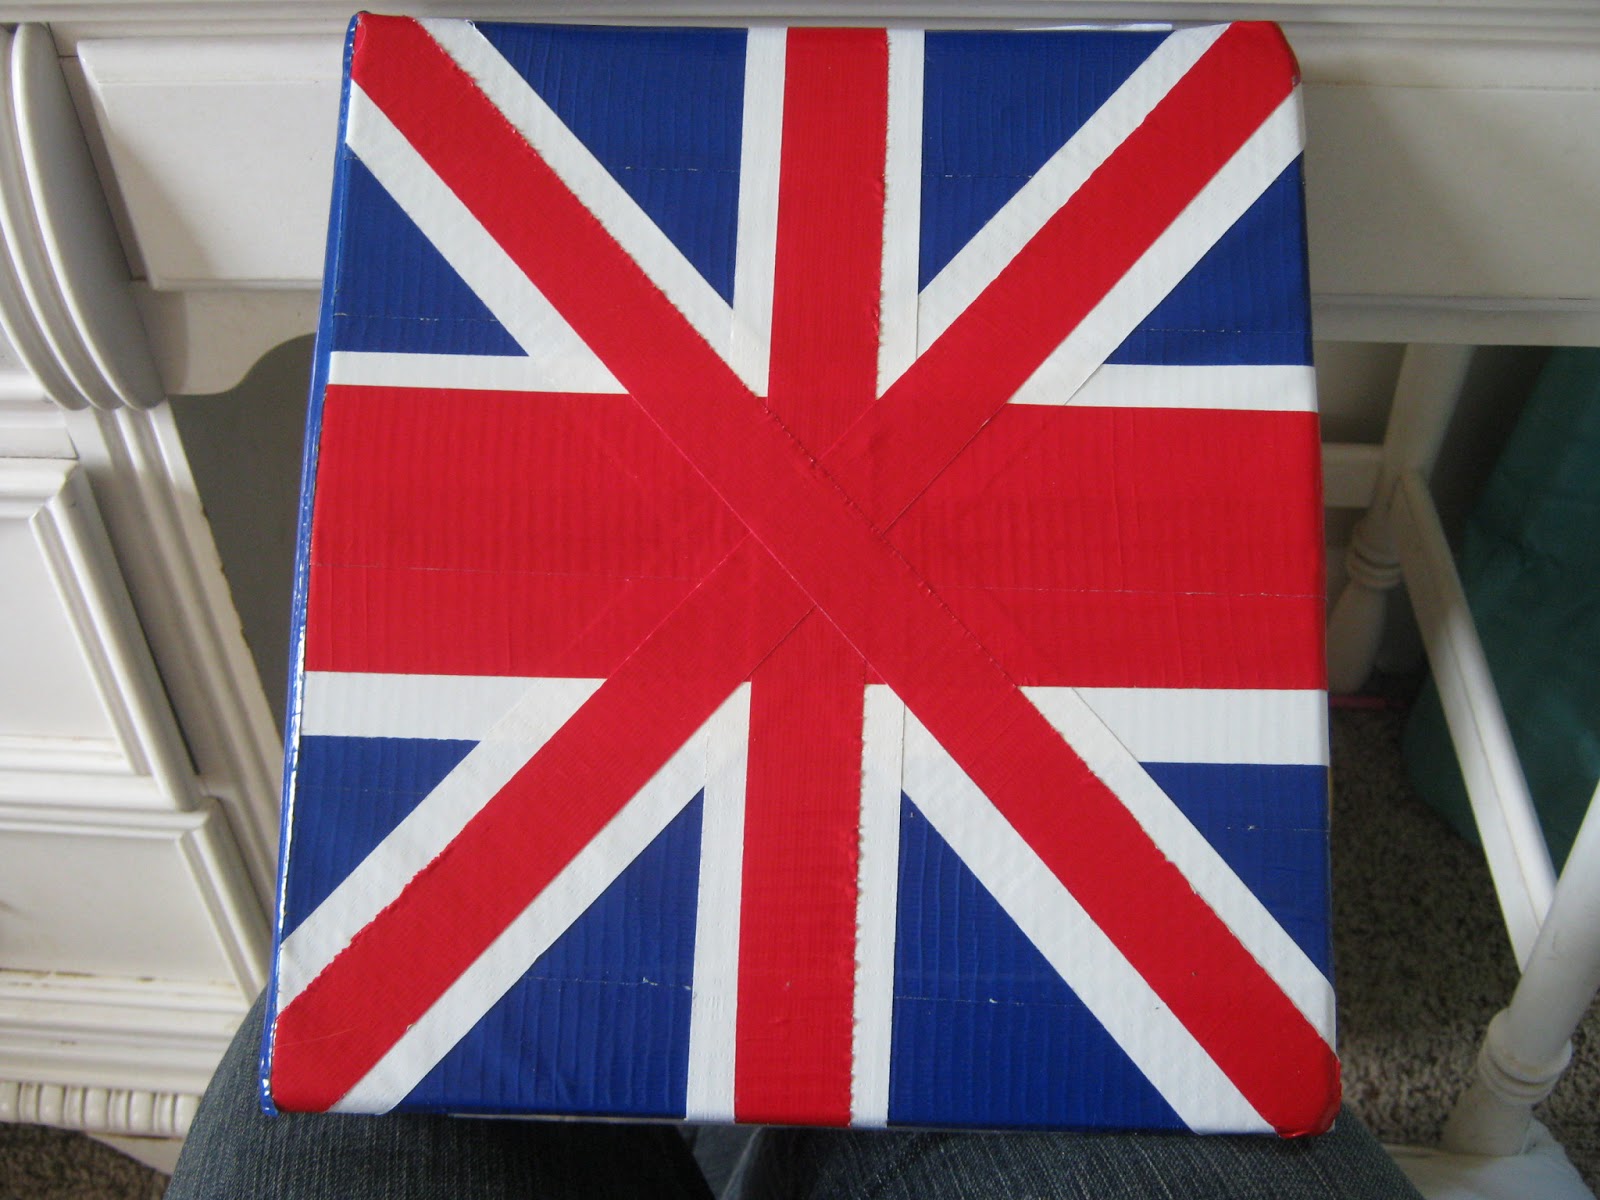
It's a British Flag binder! I made it with Duct Tape. Basically just covered all of it in dark blue Duct Tape and then used the red and the white to do the pattern you see on the front. The back is all dark blue. This is the binder I will use to put my flute music in for my band class. Took me a while, but I think It's really cool!! What do you guys think?

Rating: Difficulty- 3
Time: Surprisingly, a 4
Overall- 4 1/2

-Victoria

Thursday, January 10, 2013

Free Music?

This is for downloading music from YouTube!For Christmas I finally got an mp3 player! But the problem is, buying the music to put on them can be kinda expensive. In my opinion anyway. So that's why I had put off getting one for the longest time. But when I saw this on Pinterest I thought it might be worth a try. Basically what you do is you go to Youtube, copy the URL, paste it onto this website and it turns it into a free mp3 download! It almost sounded too good to be true!! But I gave it a try and it works! It takes less than a minute to convert it and is free. How does it get better than that? Here's the link if you want to us it too: http://www.flvto.com/#.UADrvZtSFI0.pinterest

So rating time!! 
Difficulty: I'm going with 1. Maybe 2 if you aren't good with this kind of stuff
Time: Like said, too less than a minute, so it's a 1
Overall: 5! Because it is cool!

Well, that's all we have for today! See you next time,
Victoria

Saturday, September 15, 2012

Update

For those of you who were interested in seeing, here's a picture of MY hat!


What do you guys think?

Victoria

Our First (Somewhat) Epic Fail

Now, before I start I would like to say something. Lately I've been looking at the Pintrosity blog. (Funny stuff by the way) There's stuff on there I wonder how in the WORLD that could go wrong. But it does. And this project was one of those projects.

  For a while anyway. My first attempts were BAD. They looked my thing of ribbon had a fight with the potato masher. It took at least 25 million 10 times for me to even make progress on how they look.

Here's the original pin:

Potato Masher Bow


My first ones did NOT turn out like this. Here's with progress:
Here's my best one:

 Isn't it pretty?!

One of my complaints would be that the wider ribbon didn't work well. Here's my example:
 It wouldn't work because it was as wide as the potato masher and so it was hard to wrap around like you need it to. it wouldn't cooperate with me OR the potato masher. I usually got better results from the thinner ribbon.

 So, the rating. Overall it was a 3. I was OK with it. Time was a 1. Under 20 minutes for sure. Lastly, difficulty. This was a one because it's easy enough for anyone. And all you need is a potato masher, ribbon, and plenty of patience!

Victoria

Monday, September 3, 2012

First Project!


Hi guys! It's me, Victoria. I'm proud to present my first project! My project is this Despicable me hat.


Now, it was definitely fun, but you would also have to have a basic knowledge of crochet and maybe a little knitting. Because although a lot of it was crochet, I also added some knitting in there. The teeth and mouth were knit while everything else was crochet. For those of you who do only one or the other, it could certainly be done only using one, but for me personally I've had better results mixing it up a little like that.

Rating- Time- 5
             Difficulty- 4
             Overall- 5

I hoped you all enjoyed this and thanks for reading!! See you next week!

Victoria

Wednesday, August 15, 2012

Welcome to our blog!

Hey guys!! Welcome to our blog! On our blog we will be doing crafts, projects, ideas, and recipes off of Pinterest. We will do our project, show you how we did it, and rate it. We will rate it on difficulty, time it took, and the way it turned out. 

Here's how we will rate it:
Difficulty: 1-Anybody can do this
2-Really easy
3-Medium
4-Harder
5-Really hard!

Time- 1- Under 20 minutes
2- Under 45 minutes
3- Under an hour
4- 1-2 hours
5- 2+ hours

Finished Project- 1- Wouldn't do it again
2-Wasn't very pleased with it
3-Turned out OK
4-I'm happy with how it turned out
5-Definitely do again!

This is our rating system, and we will be using it at the end of each project. There will be at least two posts a week, one from each of us!

Stay tuned and Thanks for reading!!